Download and Installing Oracle Database 11g on Windows:-
Before Installing the Oracle database you have to Setup of Oracle database. If you have already download its ok. Otherwise you download on this link Go For Download[Oracle Database 11g Release 2 (11.2.0.1.0)]
Installing Oracle Database 11g on Windows:- We should follow the following steps:
Step (1):- For this installation, you need either the DVDs or a downloaded version of the DVDs. In this tutorial, you install from the downloaded version. From the directory where the DVD files were unzipped, open Windows Explorer and double-click on setup.exe from the \db\Disk1 directory.
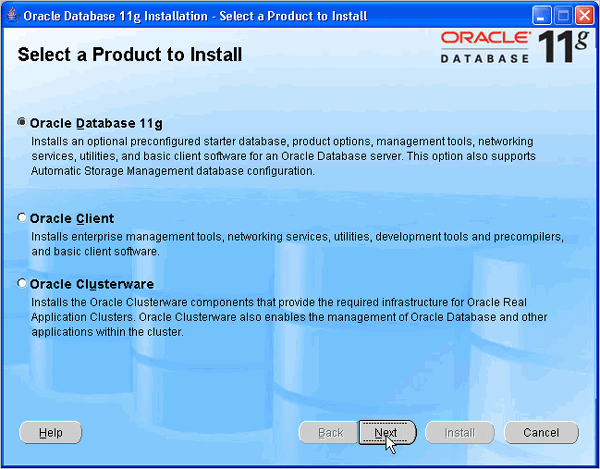
Step (2):- The product you want to install is Oracle Database 11g. Make sure the product is selected and click Next.
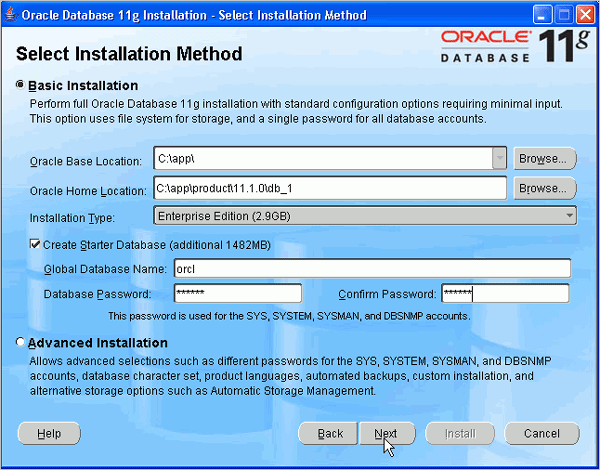
Step (3):- You will perform a basic installation with a starter database. Enter orcl for the Global Database Name and oracle for Database Password and Confirm Password. Then, click Next.
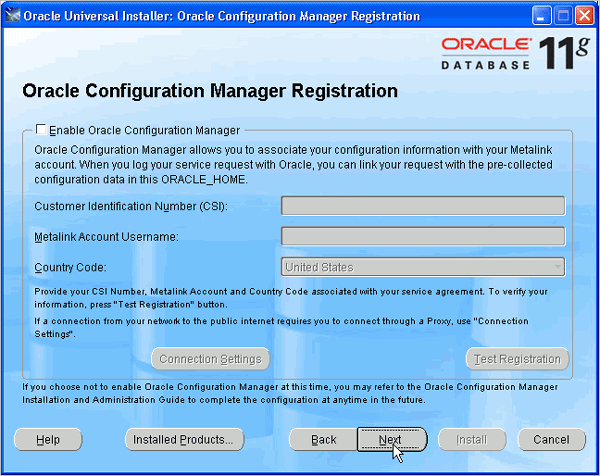
Step (4):- Oracle Configuration Manager allows you to associate your configuration information with your Metalink account. You can choose to enable it on this window. Then, click Next.
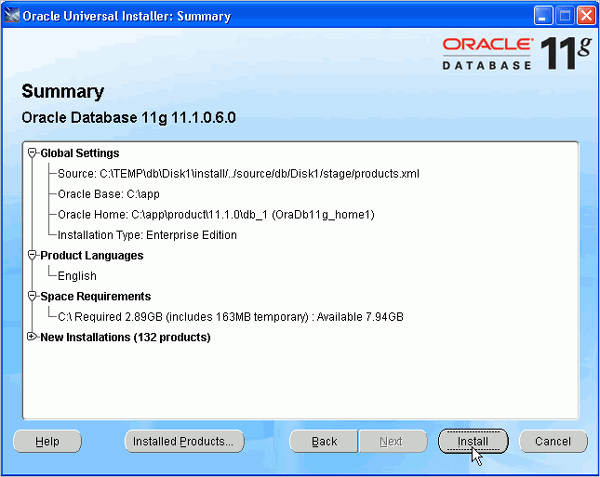
Step (5):- Review the Summary window to verify what is to be installed. Then, click Install.
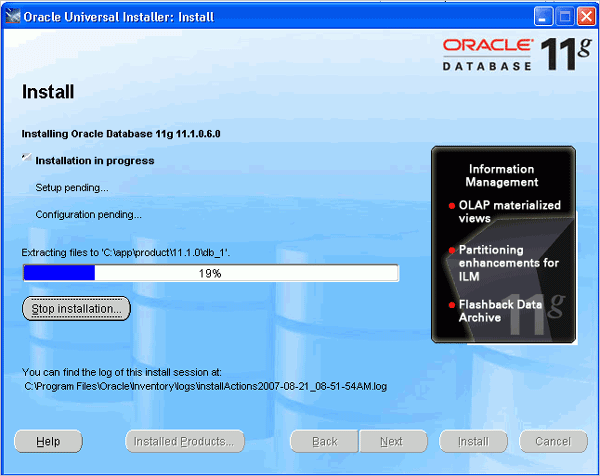
Step (6):- The progress window appears.
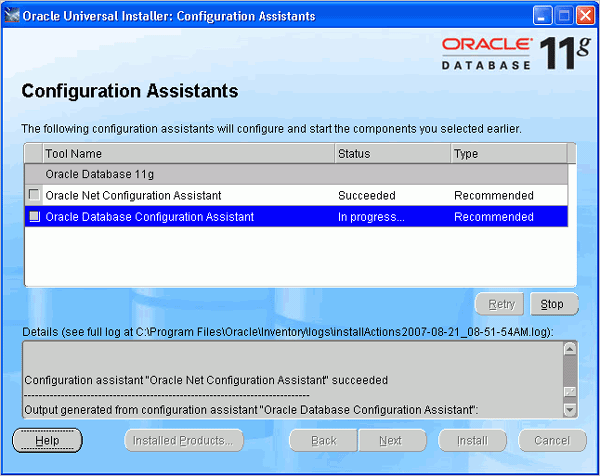
Step (7):- The Configuration Assistants window appears.
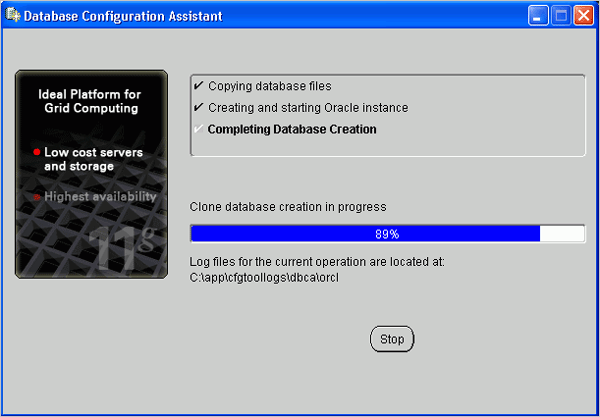
Step (8):- Your database is now being created.
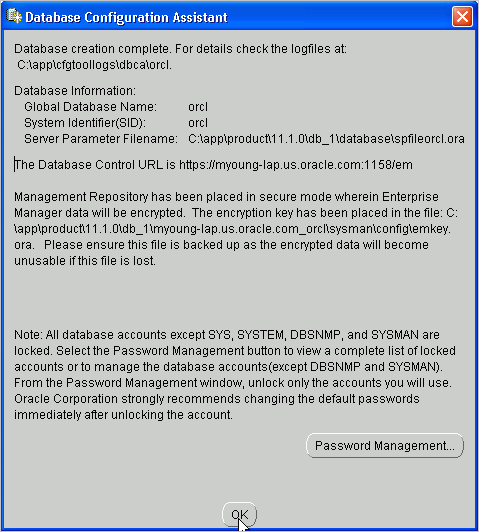
Step (9):- When the database has been created, you can unlock the users you want to use. Click OK.
Step (10):- Click Exit. Click Yes to confirm exit.
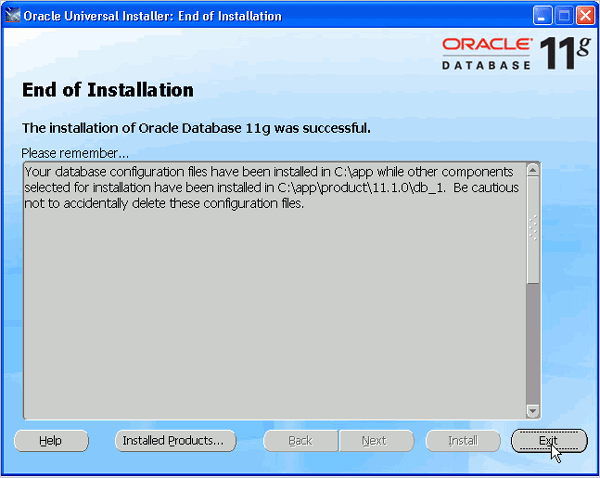
Testing Your Installation:- To test that your installation completed successfully, perform the following steps:
Step (1): Open a browser and enter the following URL:
https://:1158/em
where should be changed to your machine name, IP address, or localhost.
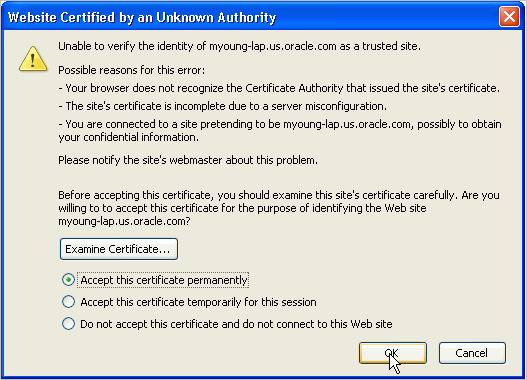
Because Enterprise Manager Database Control is a secure site, you need a certificate. Select the Accept this certificate permanently option, and then click OK.
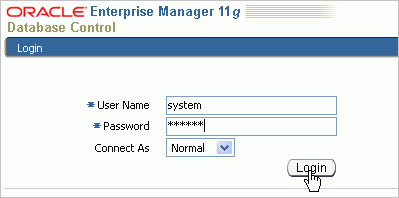
Step (2):- Enter system as the User Name and oracle as the Password, and then click Login.
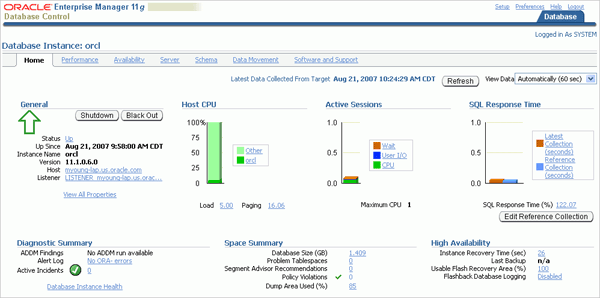
Step (3):-The Database Control Home Page appears. Your installation was successful.
Installing Oracle Database 11g on Windows:- We should follow the following steps:
Step (1):- For this installation, you need either the DVDs or a downloaded version of the DVDs. In this tutorial, you install from the downloaded version. From the directory where the DVD files were unzipped, open Windows Explorer and double-click on setup.exe from the \db\Disk1 directory.
Step (2):- The product you want to install is Oracle Database 11g. Make sure the product is selected and click Next.

Step (3):- You will perform a basic installation with a starter database. Enter orcl for the Global Database Name and oracle for Database Password and Confirm Password. Then, click Next.

Step (4):- Oracle Configuration Manager allows you to associate your configuration information with your Metalink account. You can choose to enable it on this window. Then, click Next.

Step (5):- Review the Summary window to verify what is to be installed. Then, click Install.

Step (6):- The progress window appears.

Step (7):- The Configuration Assistants window appears.

Step (8):- Your database is now being created.

Step (9):- When the database has been created, you can unlock the users you want to use. Click OK.

Step (10):- Click Exit. Click Yes to confirm exit.

Testing Your Installation:- To test that your installation completed successfully, perform the following steps:
Step (1): Open a browser and enter the following URL:
https://
where
Because Enterprise Manager Database Control is a secure site, you need a certificate. Select the Accept this certificate permanently option, and then click OK.

Step (2):- Enter system as the User Name and oracle as the Password, and then click Login.

Step (3):-The Database Control Home Page appears. Your installation was successful.
